Parallels
CERN has a limited enterprise licence for Parallels Desktop, which is a user-friendly virtualisation solution for Mac. CERN users can install and use Parallels Destop for work-related tasks on Mac computers that are regularly on site. Macs that do not report to the MDM Server (see Self-Service link below), or that report mainly from outside of CERN) will be blocked from using Parallels.
Please note: The licencing cost for CERN depends on the number of Macs where Parallels Desktop is installed. If you previously installed Parallels but you no longer use it, please uninstall it so that CERN is not charged for your installation. Activations for Macs no longer active on the CERN network are revoked regularely.
Installation
Mac
CERN users can install Parallels on Macs that are on site or have been on site recently by using the Mac Self-Service. More information about how to access the Self-Service is available here.
Features
- DirectX 11 Support
- Metal API
- Easy file sharing
- Support for Apple pencil and Sidecar
- Share bluetooth devices
- Support for performant NICE Windows instalations
Installing macOS in a Virtual Machine
Virtual Macs can be installed from the recovery partition.
Users that want to enrol their Virtual Mac to the Mac Self-Service must follow the additional steps outlined in this Knowledge Base article from Parallels.
Installing Windows 11 ARM in a Virtual Machine on Apple Silicon Macs
Apple Silicon Macs are devices with arm64 architecture (M1, M2, M3 etc chips).
Prerequisites
- An Apple Silicon Mac with macOS connected to the CERN general public network.
- Parallels Desktop software installed from the Mac Self Service.
- Windows 11 ARM based ISO file, available for download from CERNBox.
Info
This description only applies to Apple Silicon Macs to install ARM based Windows 11 system.
Please note that CMF is not working for ARM based Windows.
Creating a Virtual Machine (VM) in Parallels with the correct settings
-
After starting Parallels, go in “File Menu” and select “New”.
-
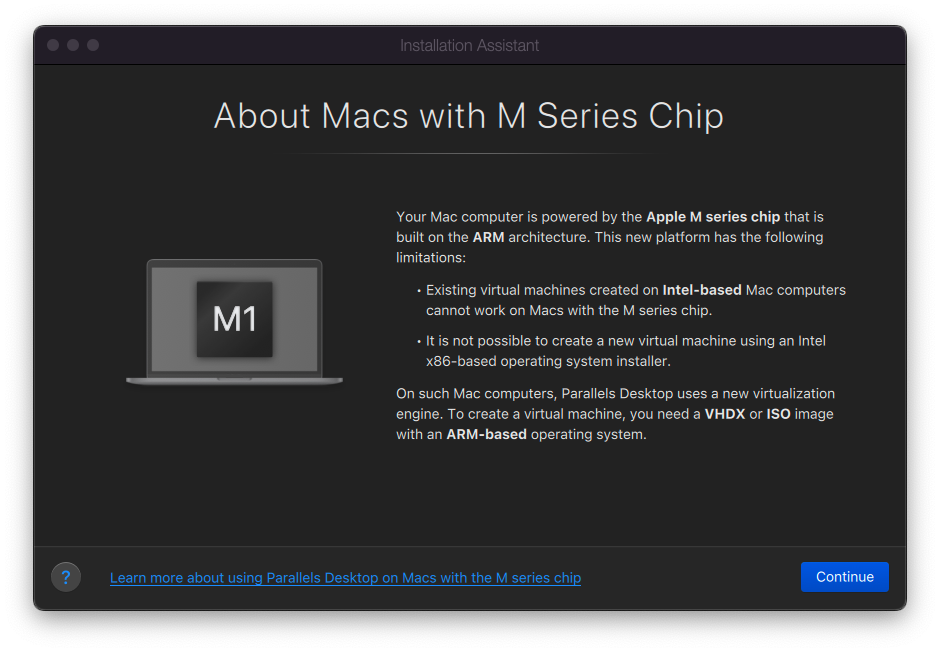
The following disclaimer will appear then and click “Continue”.
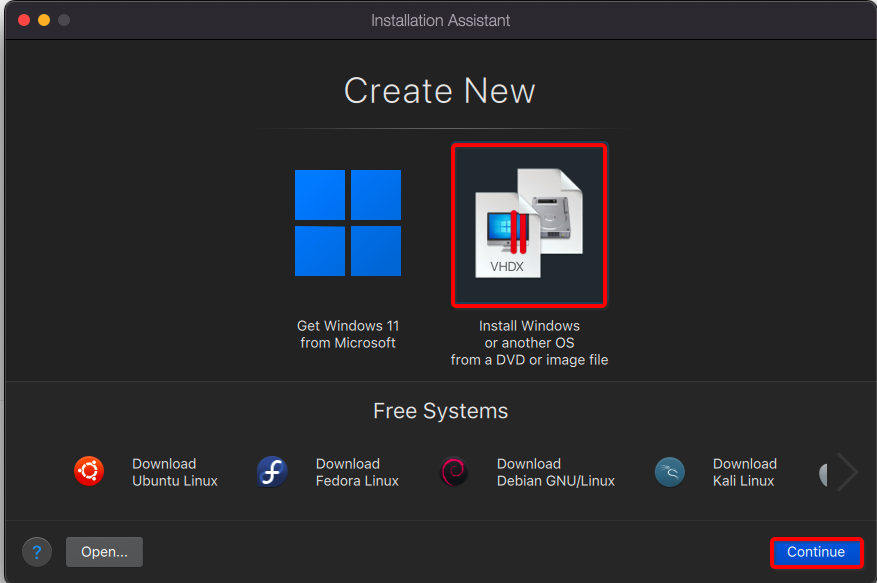
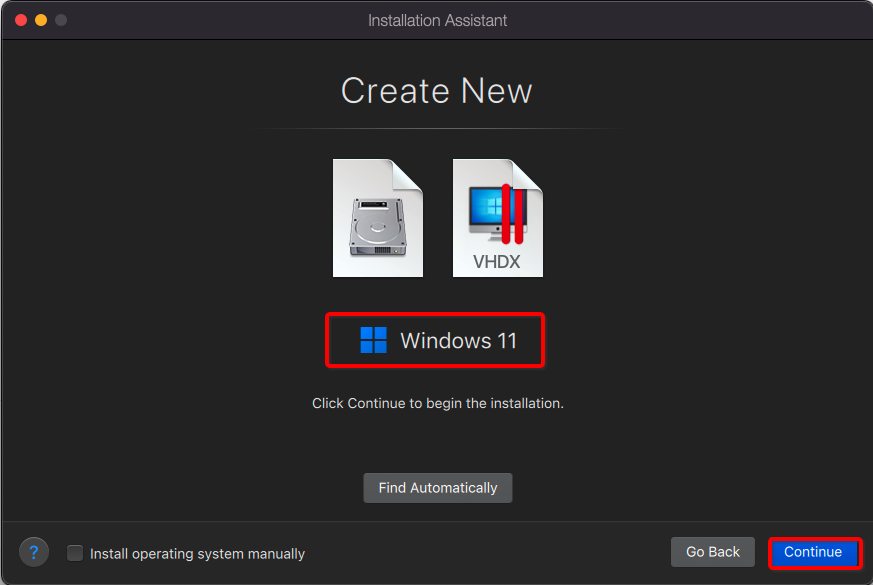
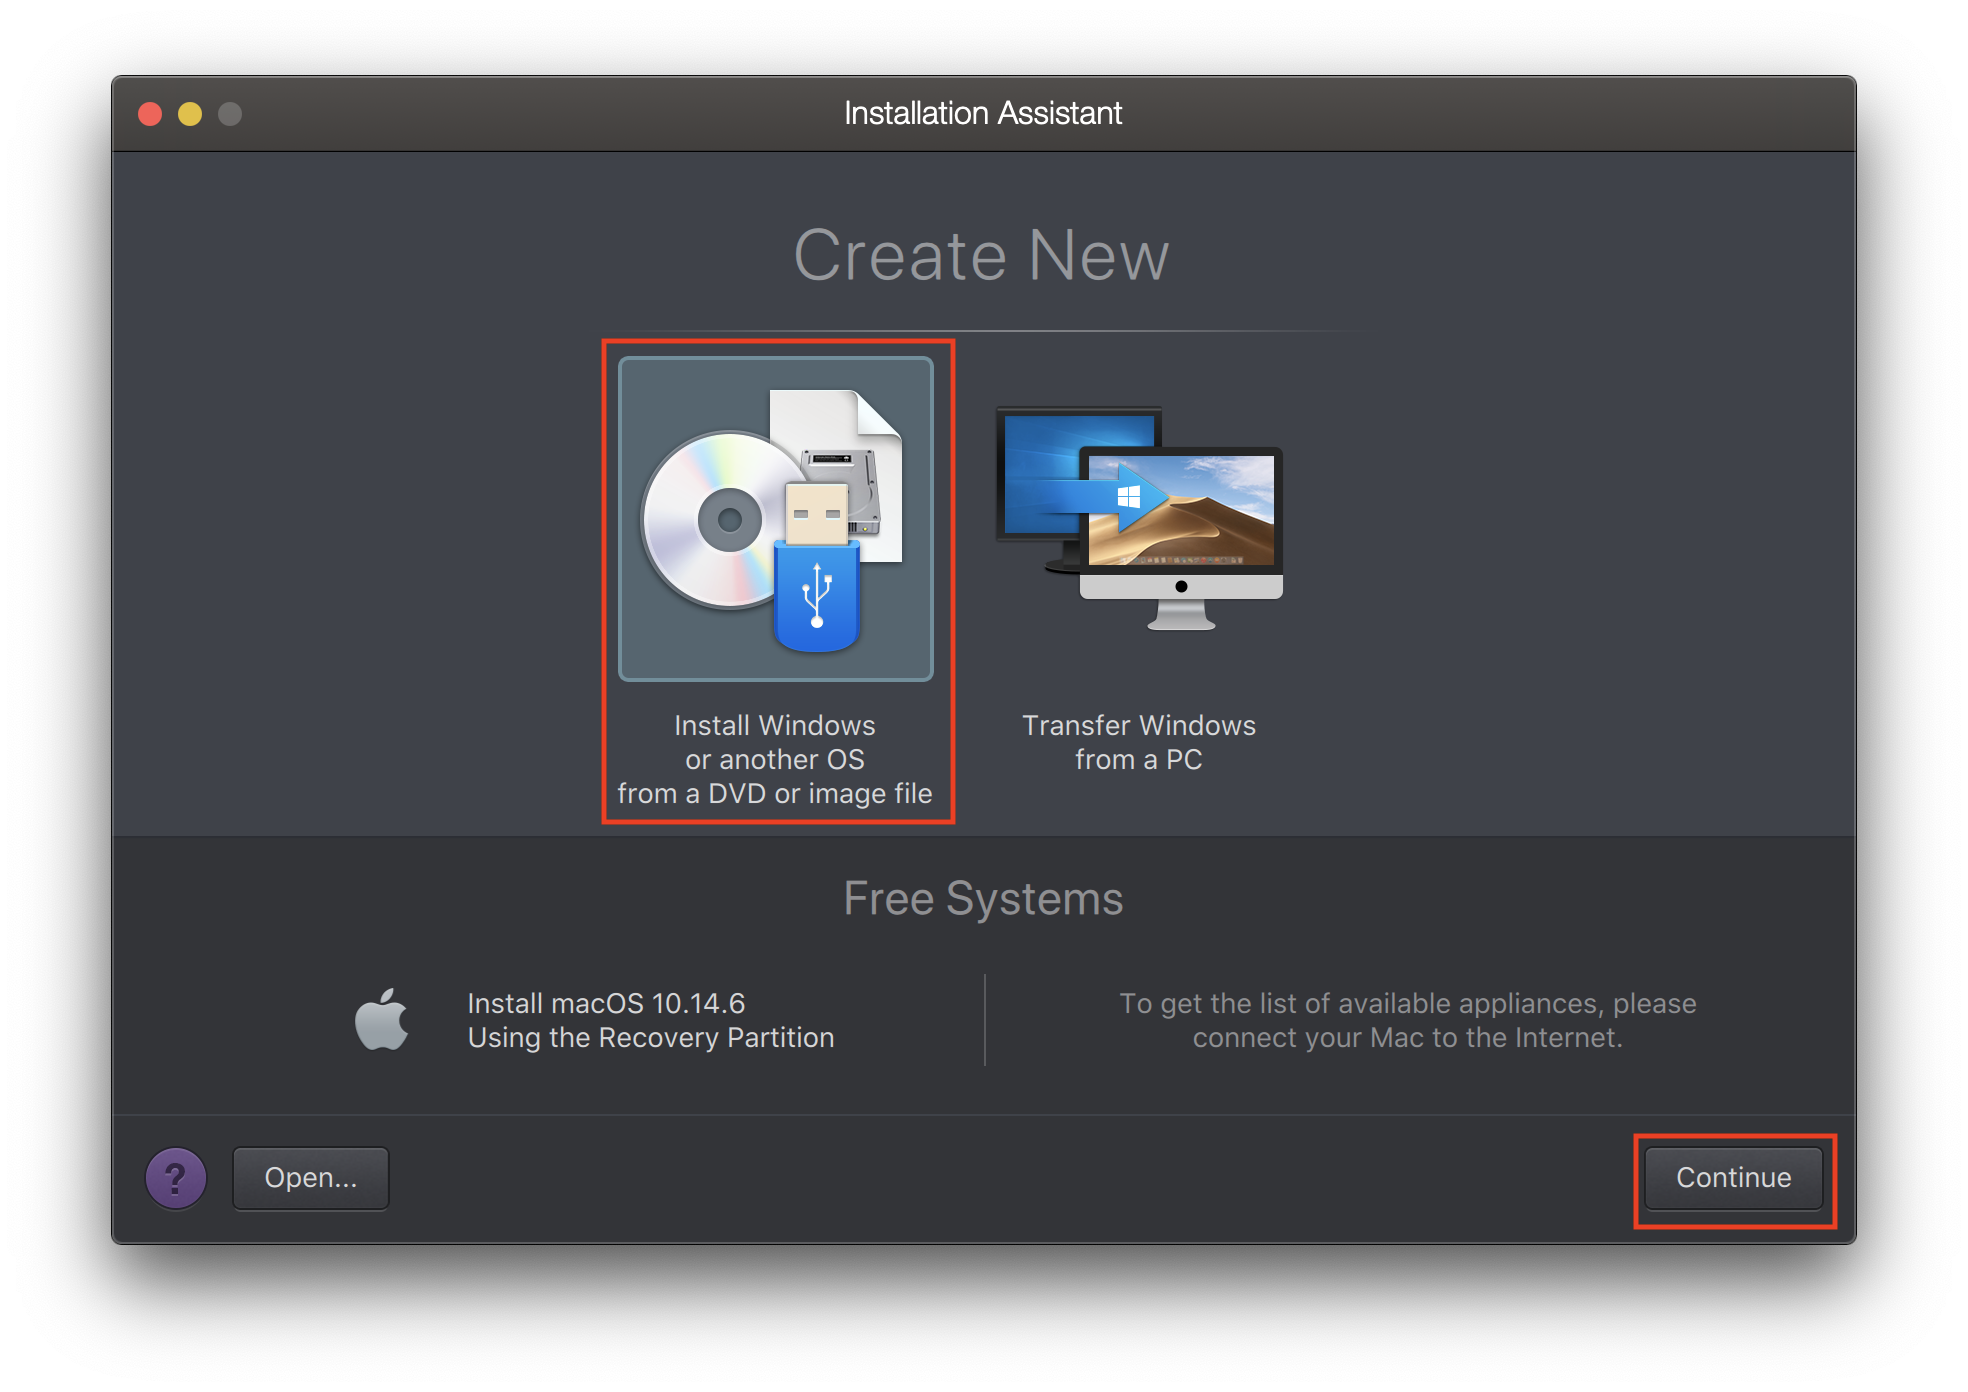
- “Install Windows or another OS…” and click “Continue”.
- Click on "Select a file" and choose the ISO files of Windows 11 for ARM which is available in CERNBox.
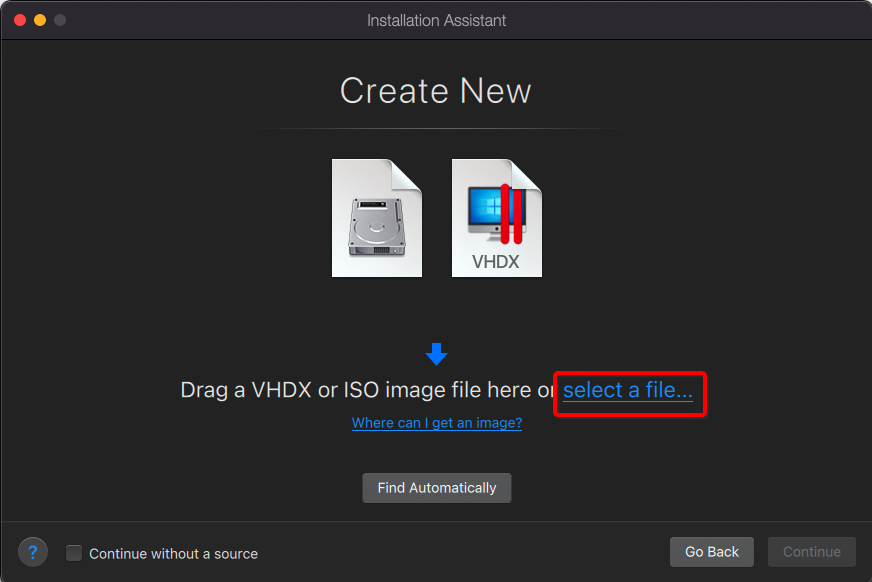
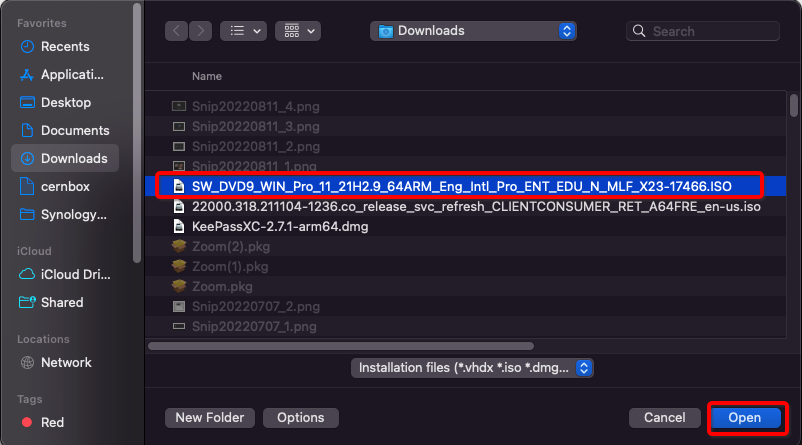
- Click “Continue”.
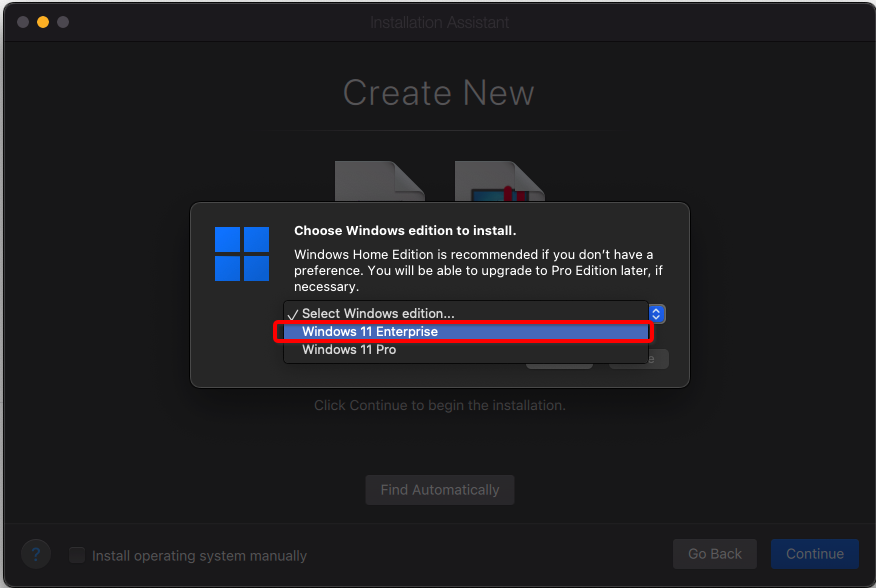
- Select "Windows 11 Enterprise" and click on "Continue"
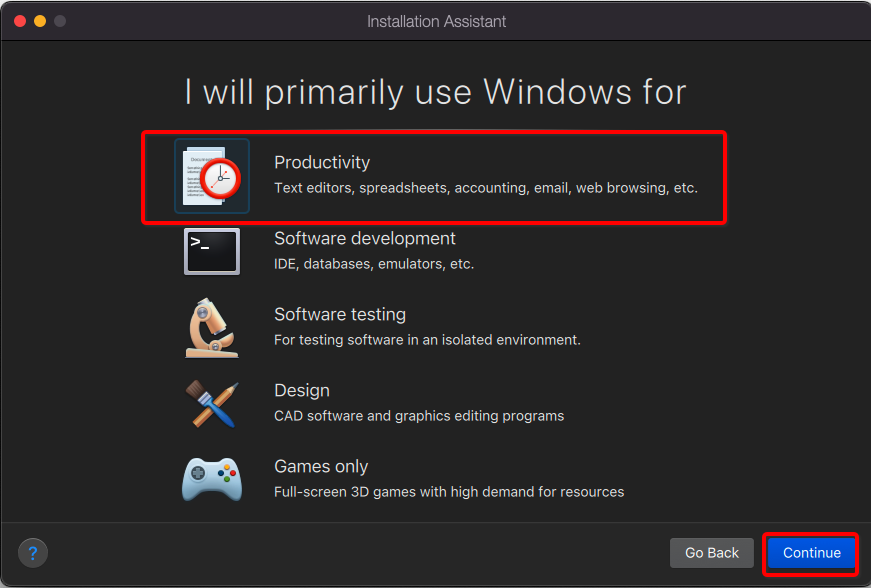
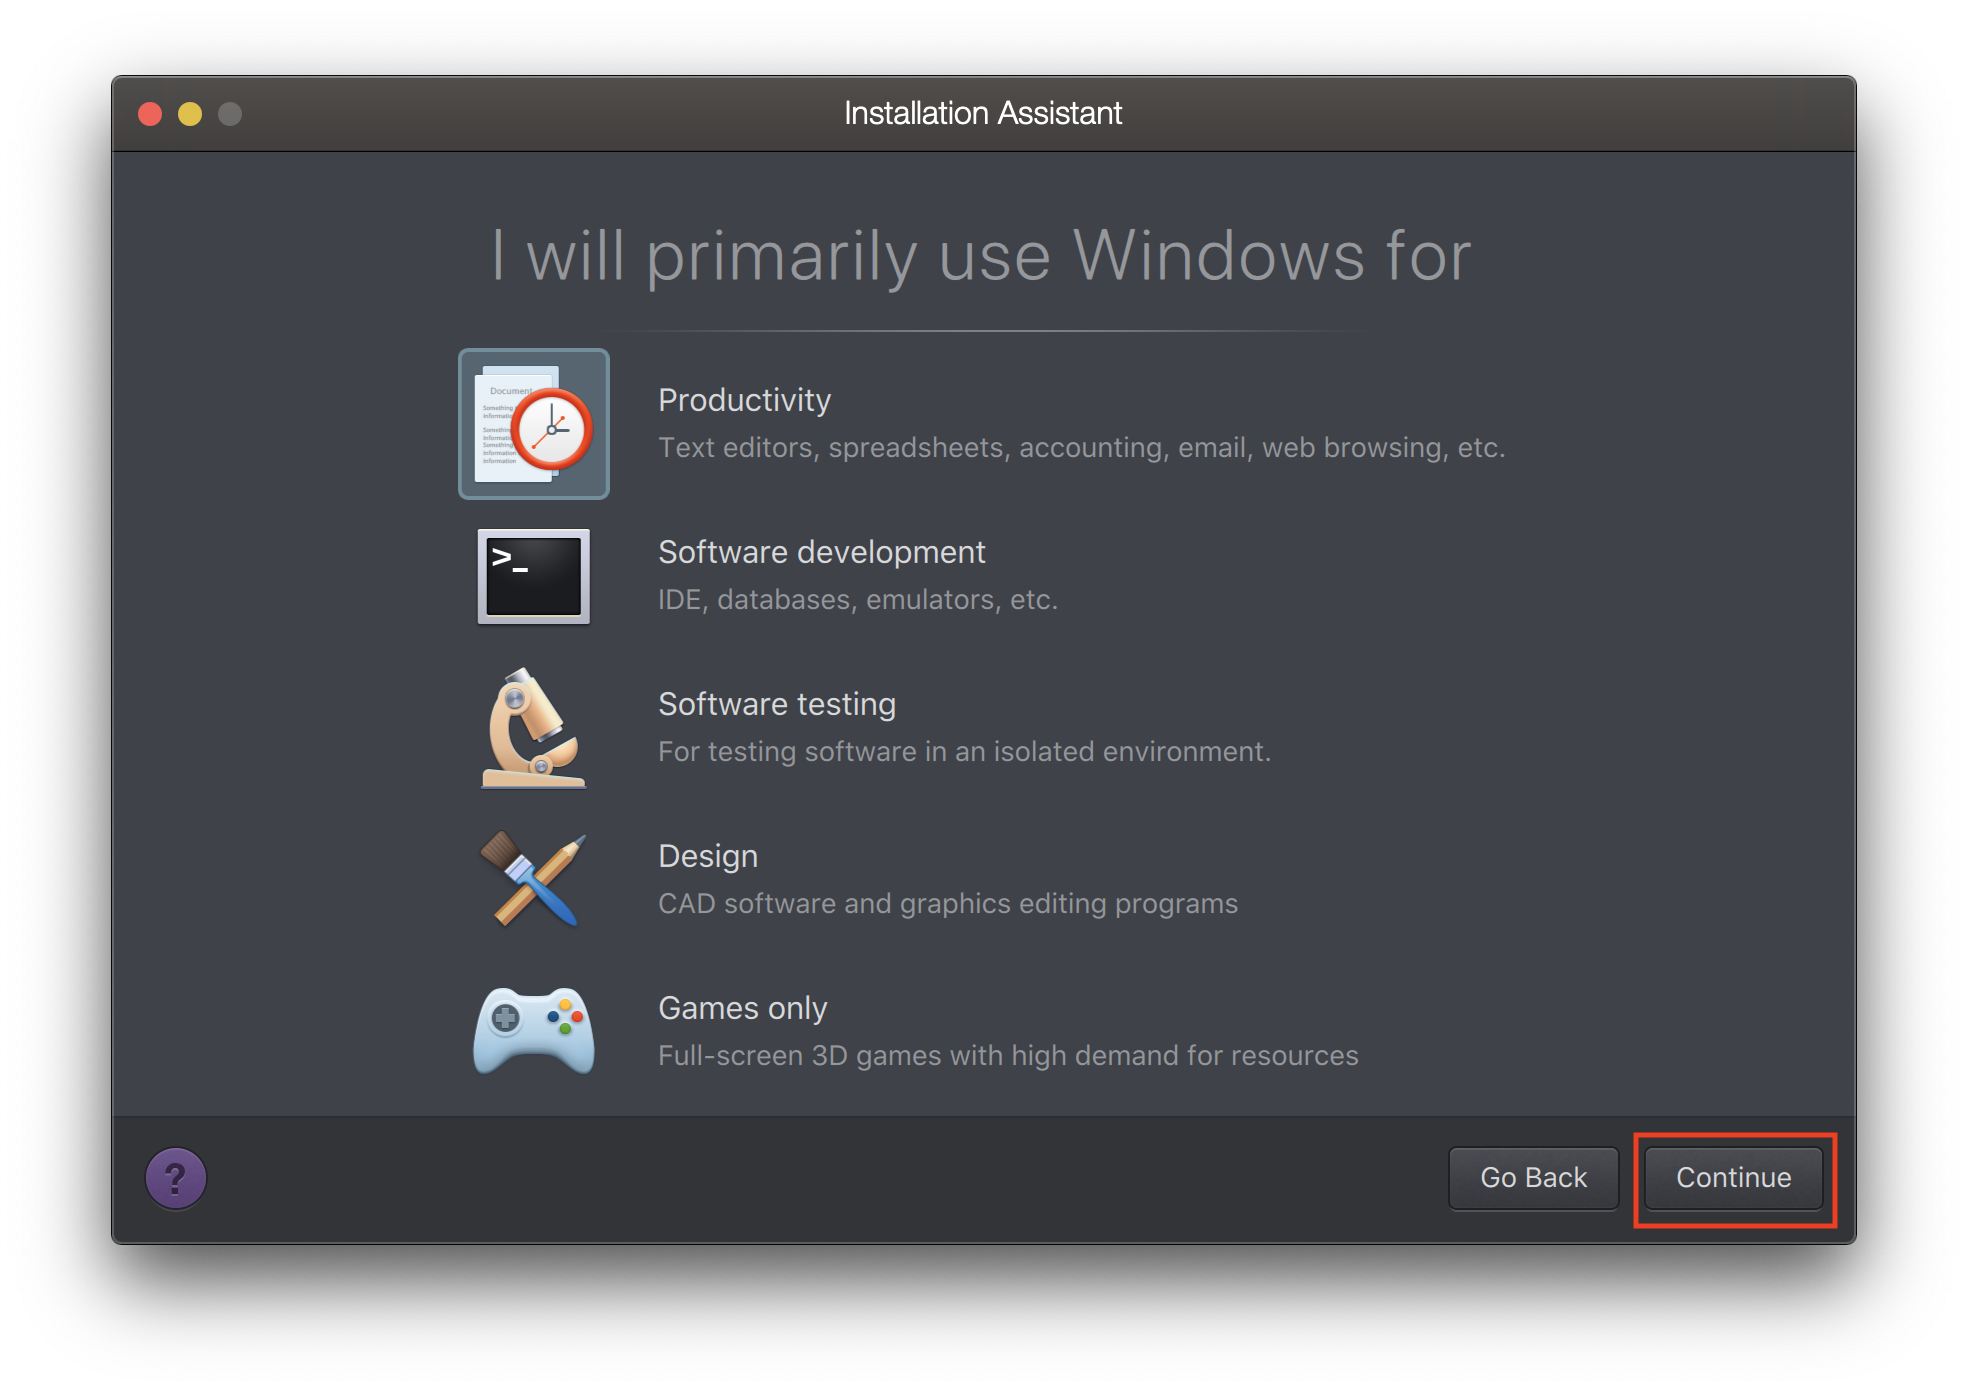
- Choose which will be the use of the new Virtual Machine and click “Continue”.
- Give a name to your Virtual Machine; you will need it later for registration at network.cern.ch. Then click on "Create"
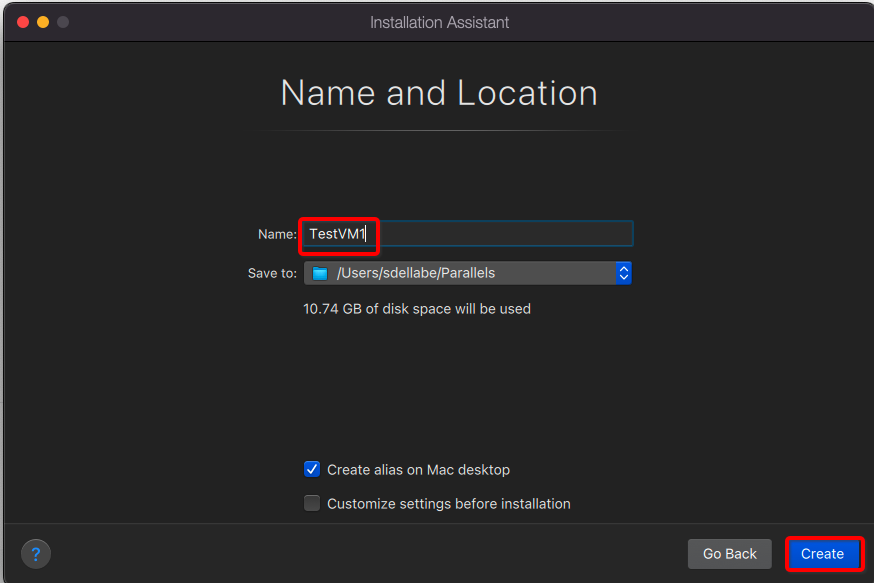
- The machine will now be created automatically, once it's done, you can directly jump to the part Register the machine in the Network DB
Installing NICE Windows 10/11 in a Virtual Machine on Intel based Macs
Prerequisites
- A Intel based Mac with macOS connected to a
portable socketon the CERN general public network. - Parallels Desktop software installed from the Mac Self-Service
Info
This following description only applies to Intel based Macs. CMF will not work on ARM based Windows 11 system
Creating a Virtual Machine (VM) in Parallels with the correct settings
-
After starting Parallels, go in “File Menu” and select “New”.
-
“Install Windows or another OS…” and click “Continue”.
-
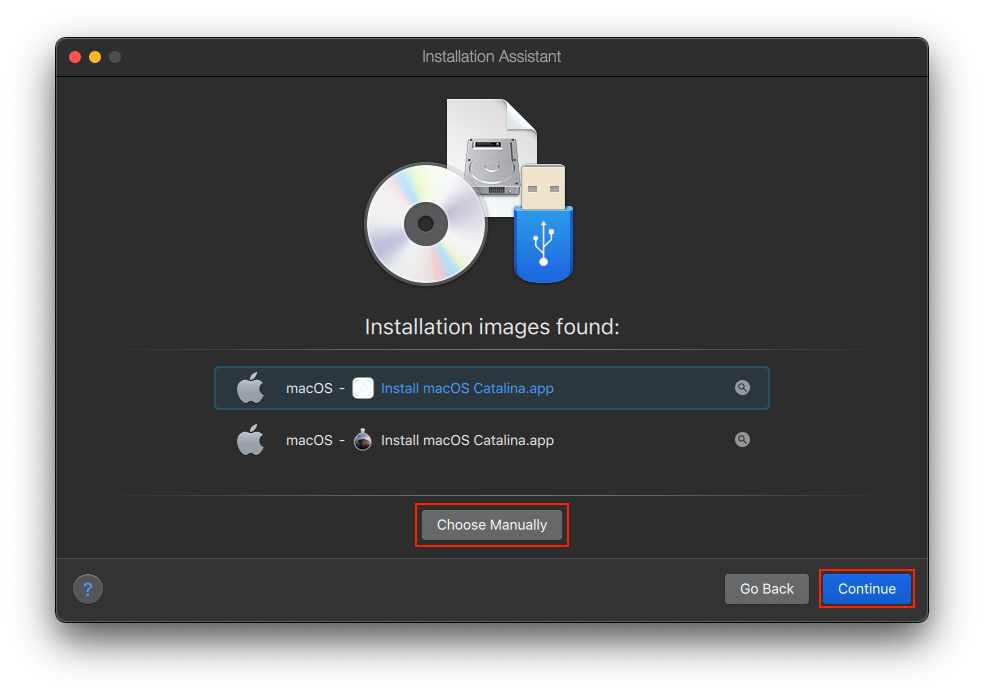
Select "Choose Manually" and click “Continue”.
-
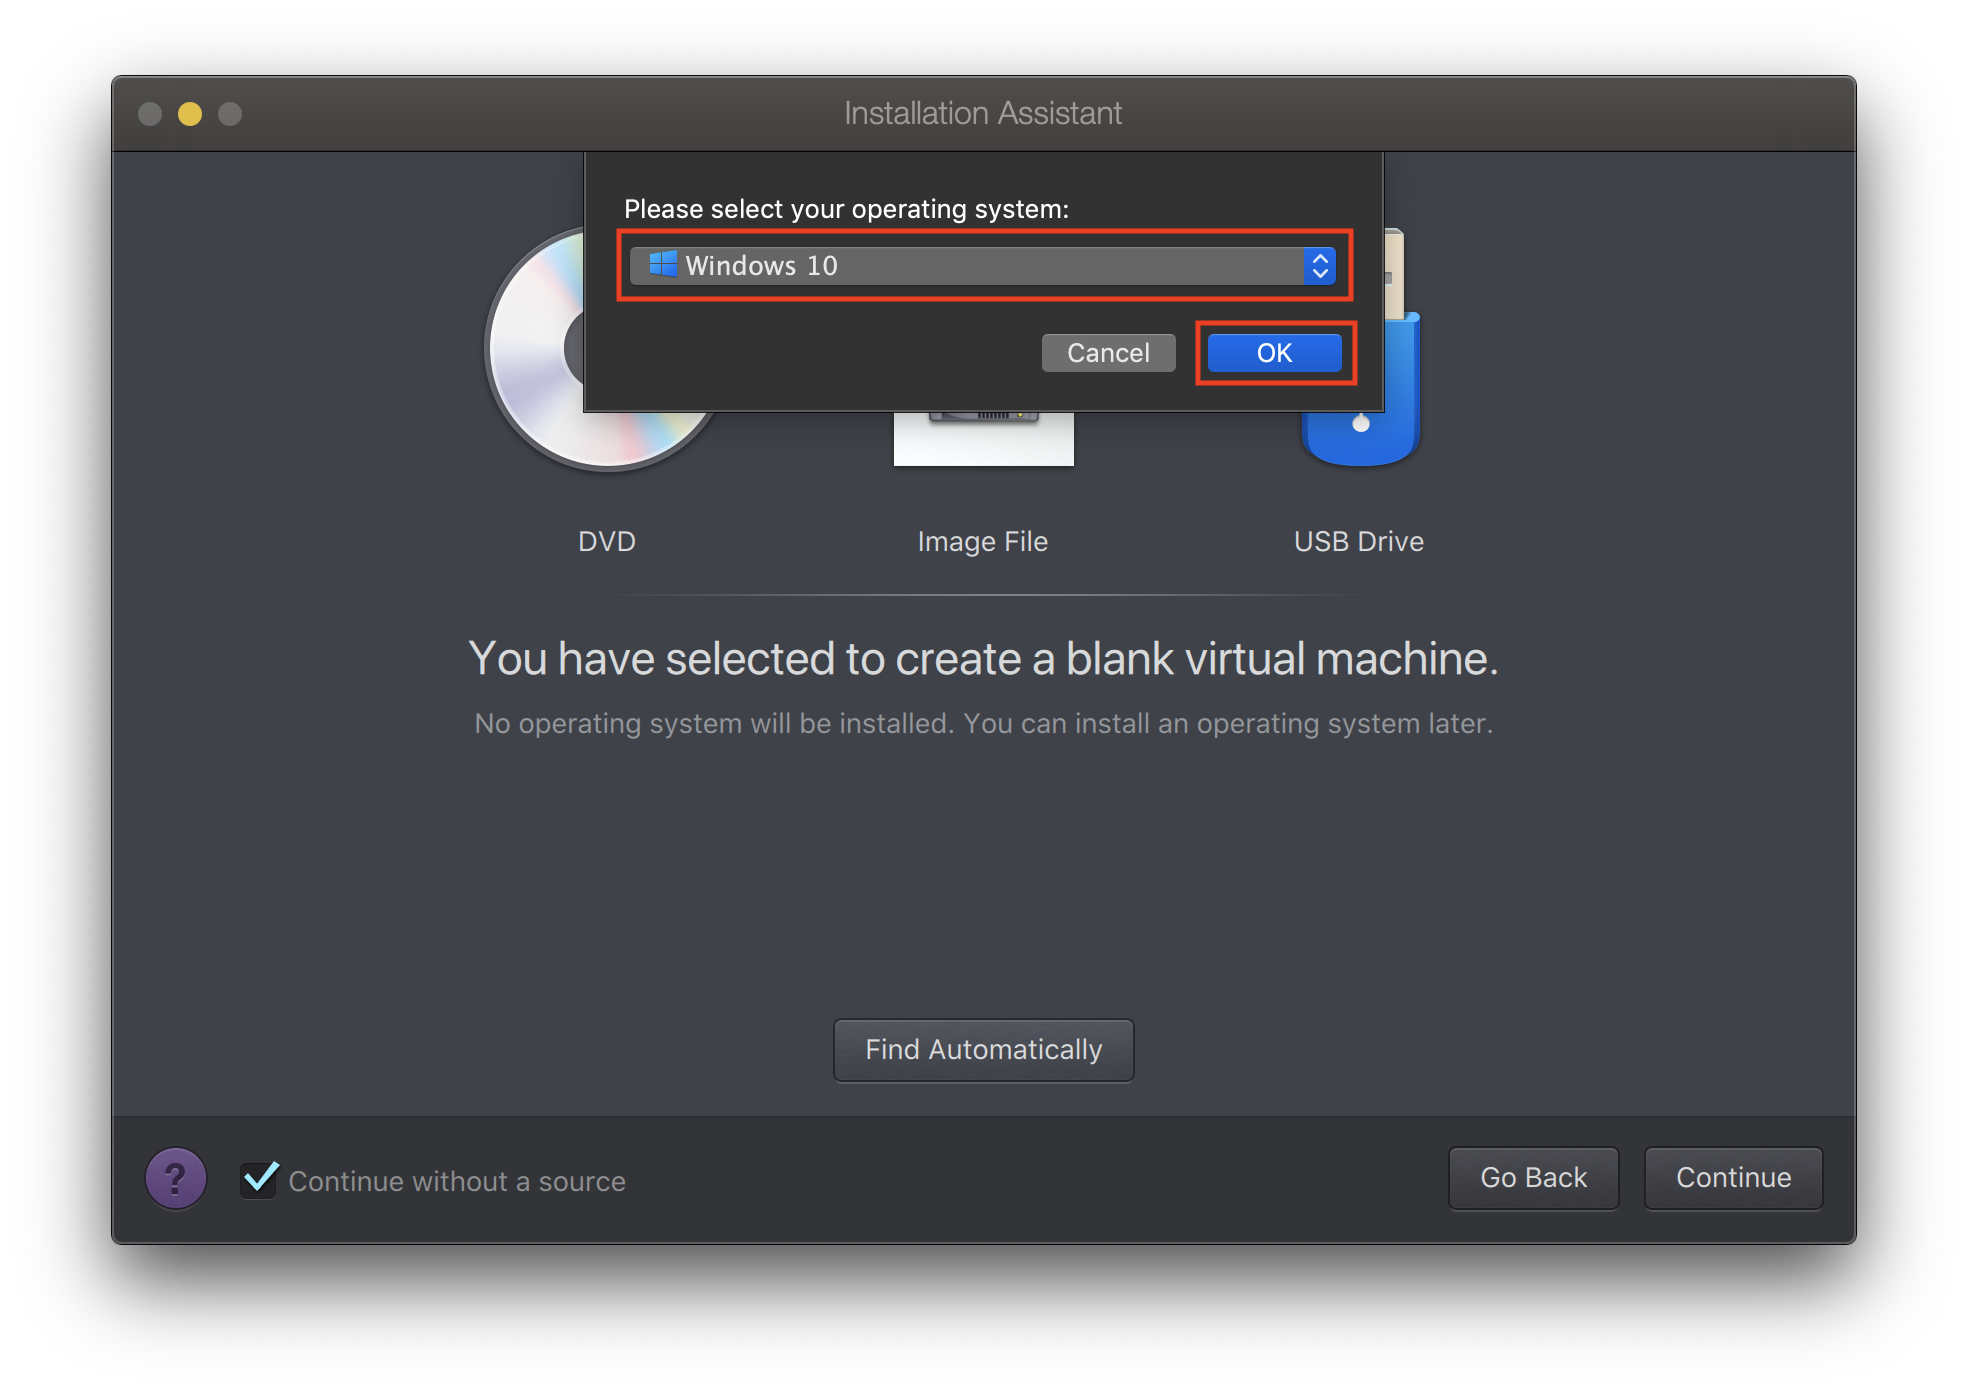
Select “Continue without a source” and click “Continue”.

-
Select the operating system: Windows 10 and click “OK”.
-
Choose which will be the use of the new Virtual Machine and click “Continue”.
-
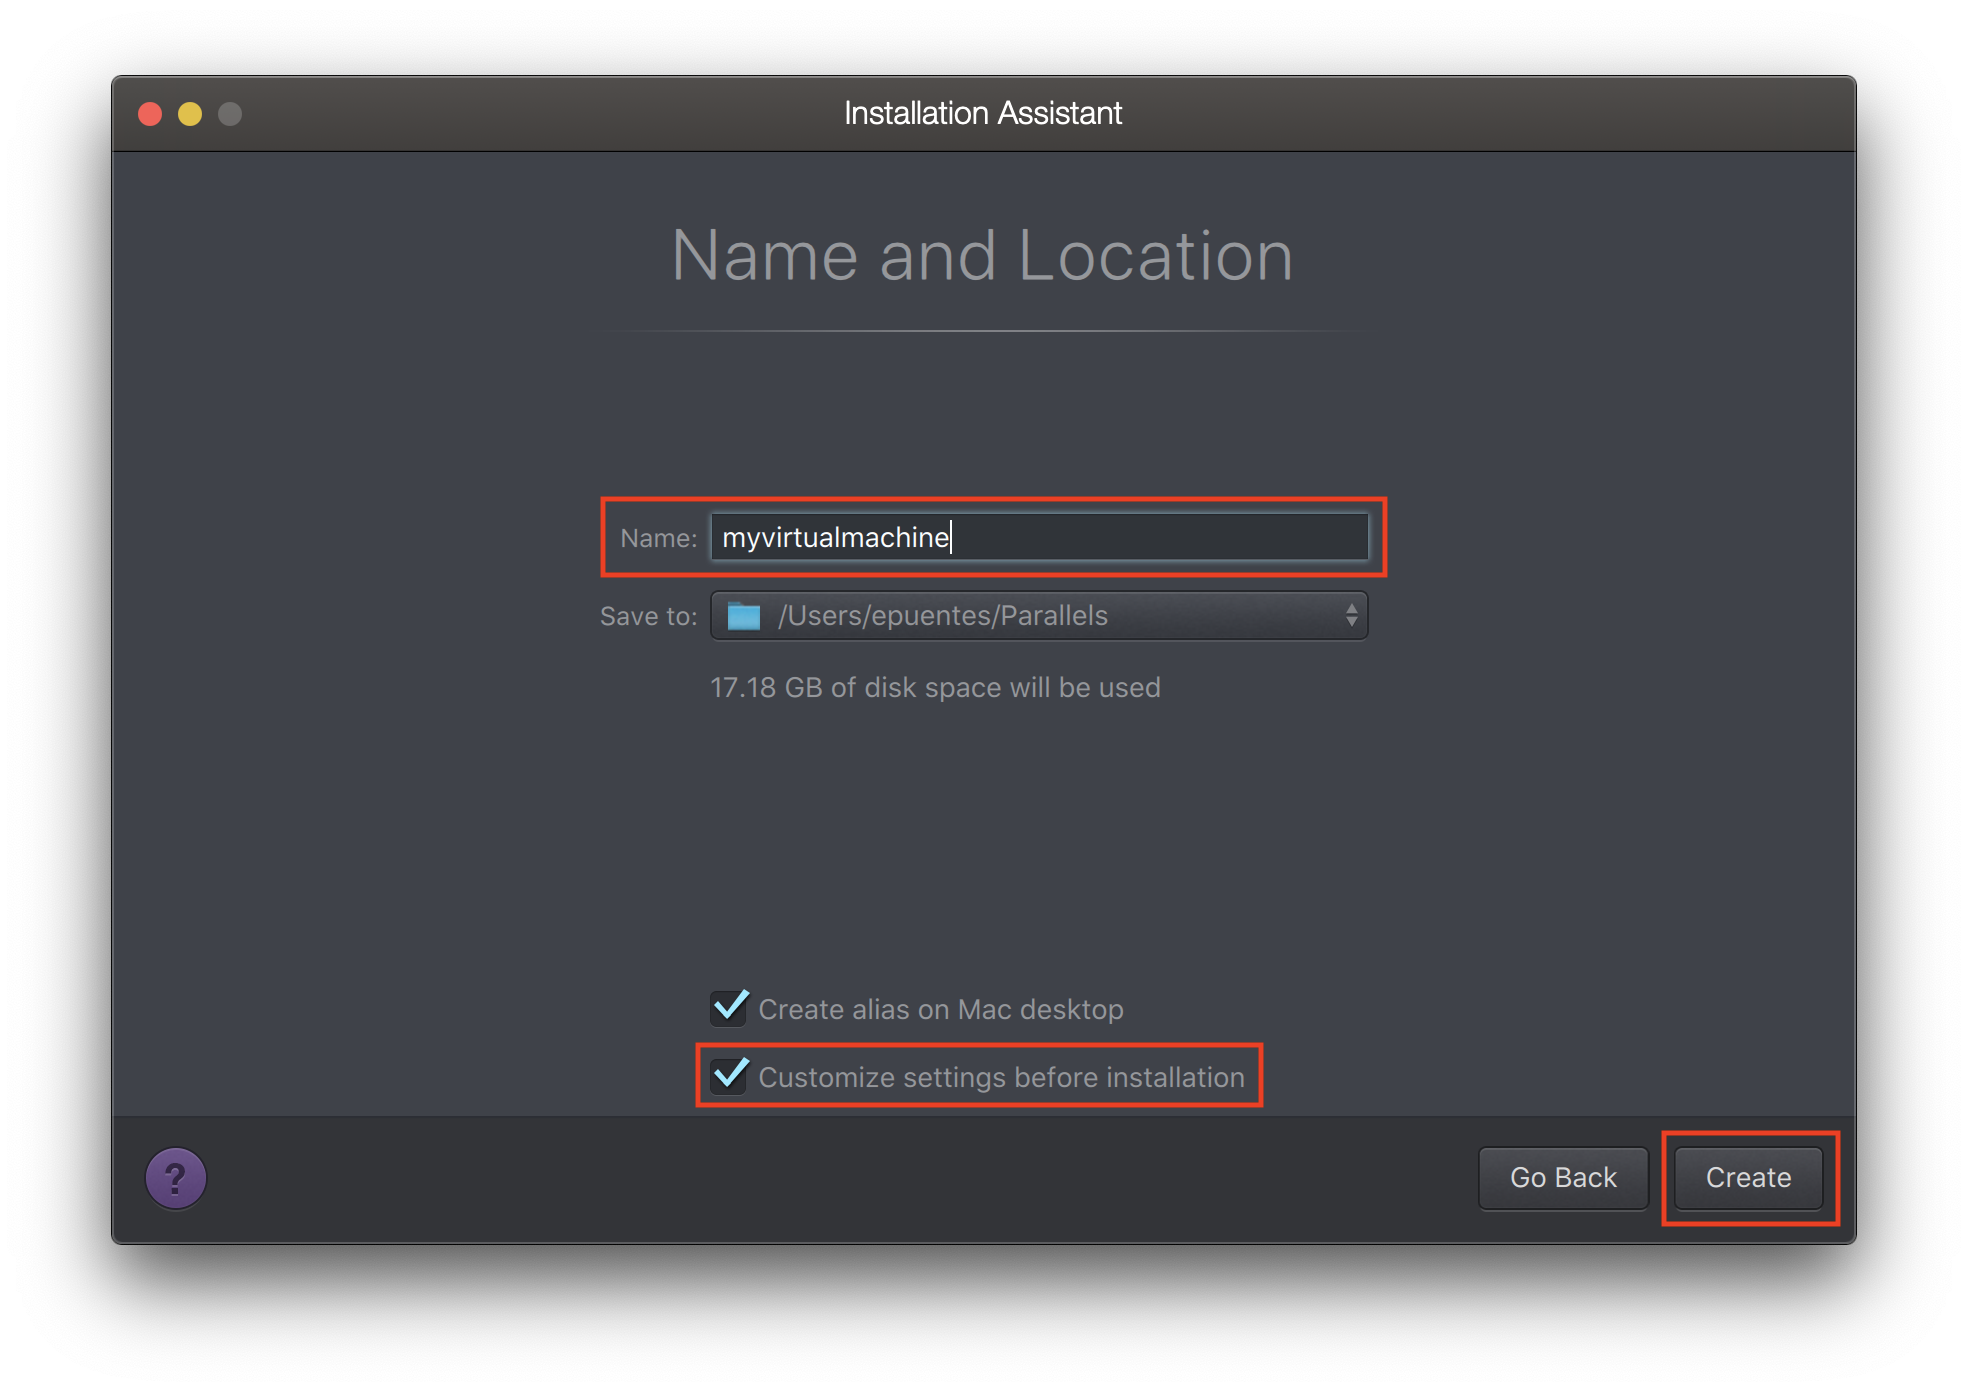
Give a name to your Virtual Machine; you will need it later for registration at network.cern.ch. Then select the check box “Customize settings before installation”. Consider selecting the checkbox “Share with other users of this Mac” to avoid storing the VM in your Documents folder. Click “Continue”.
-
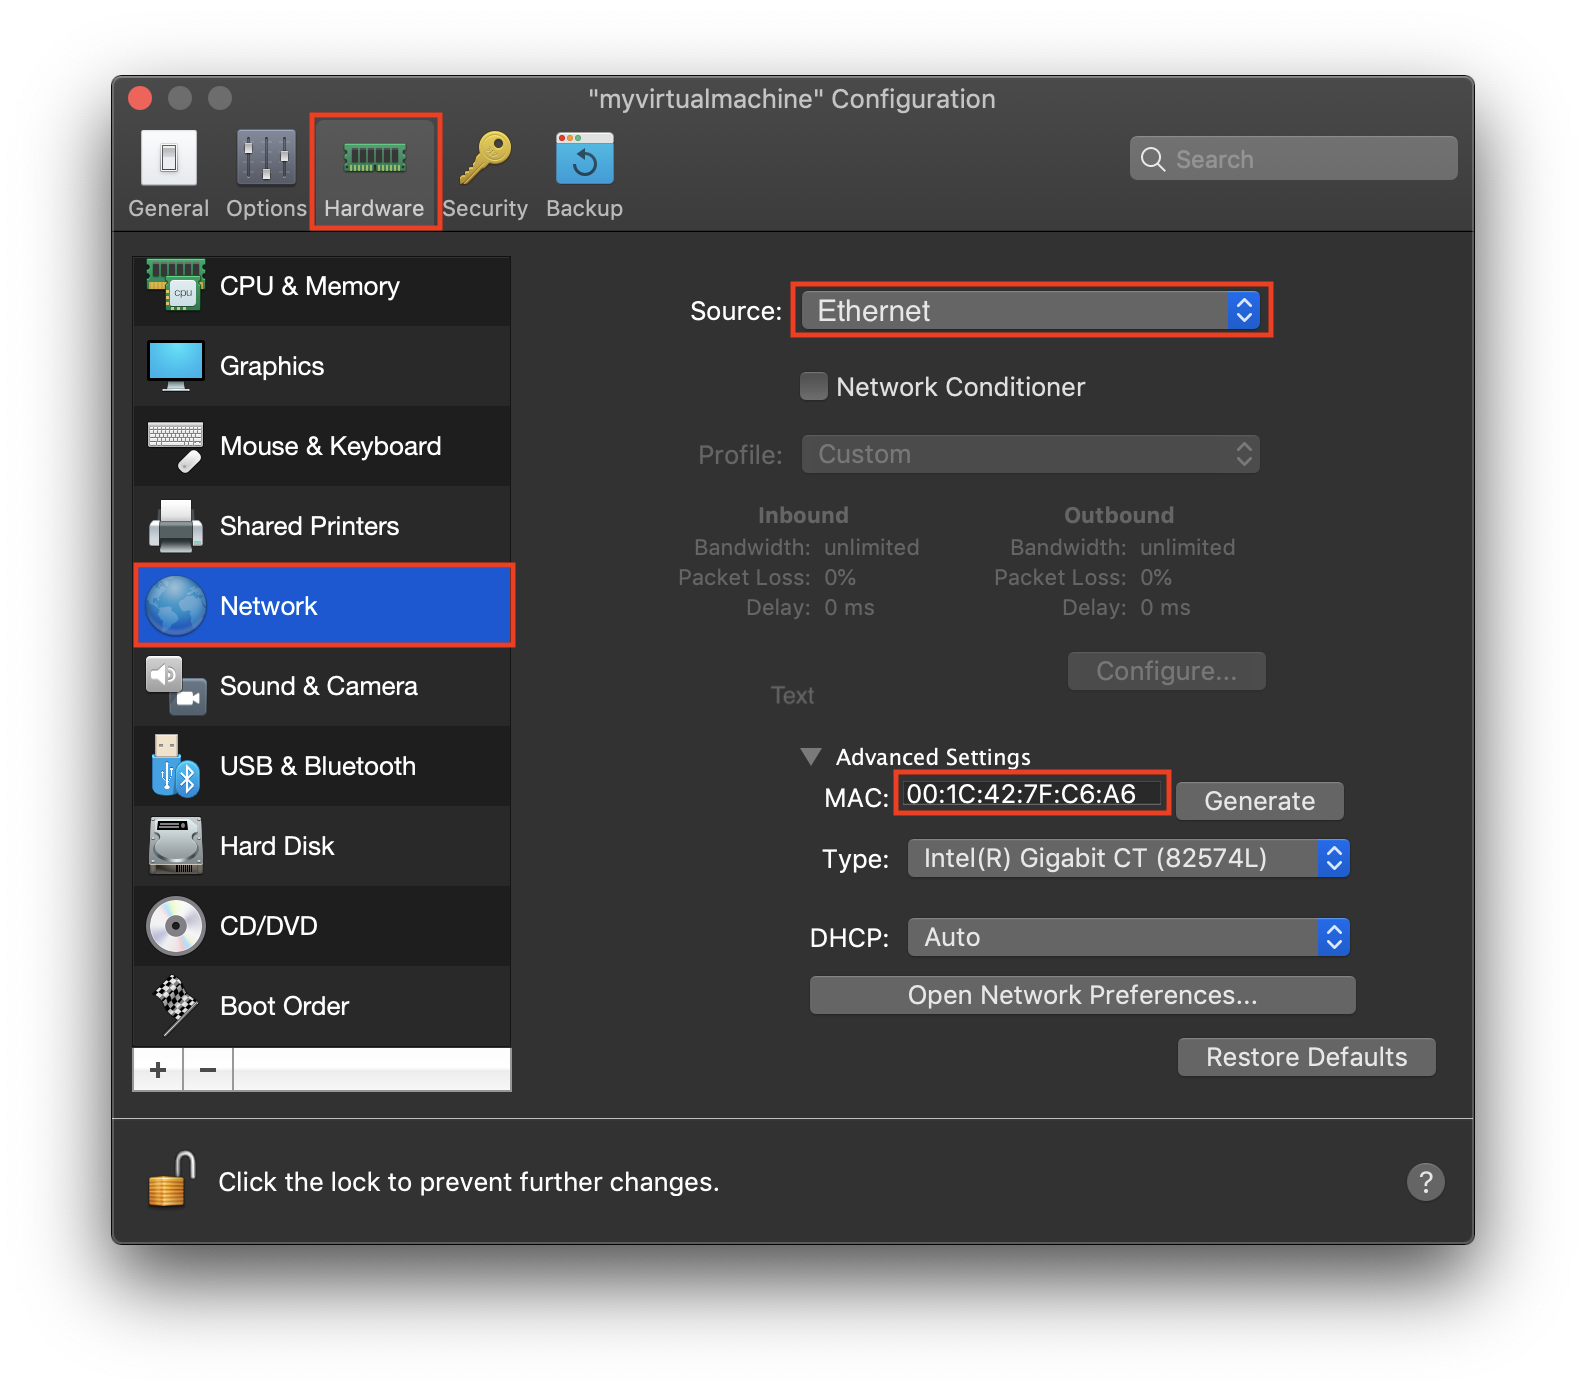
In the Hardware Tab > Network 1, select “Ethernet” and save your MAC address for future reference - you will need it for registration at network.cern.ch.
-
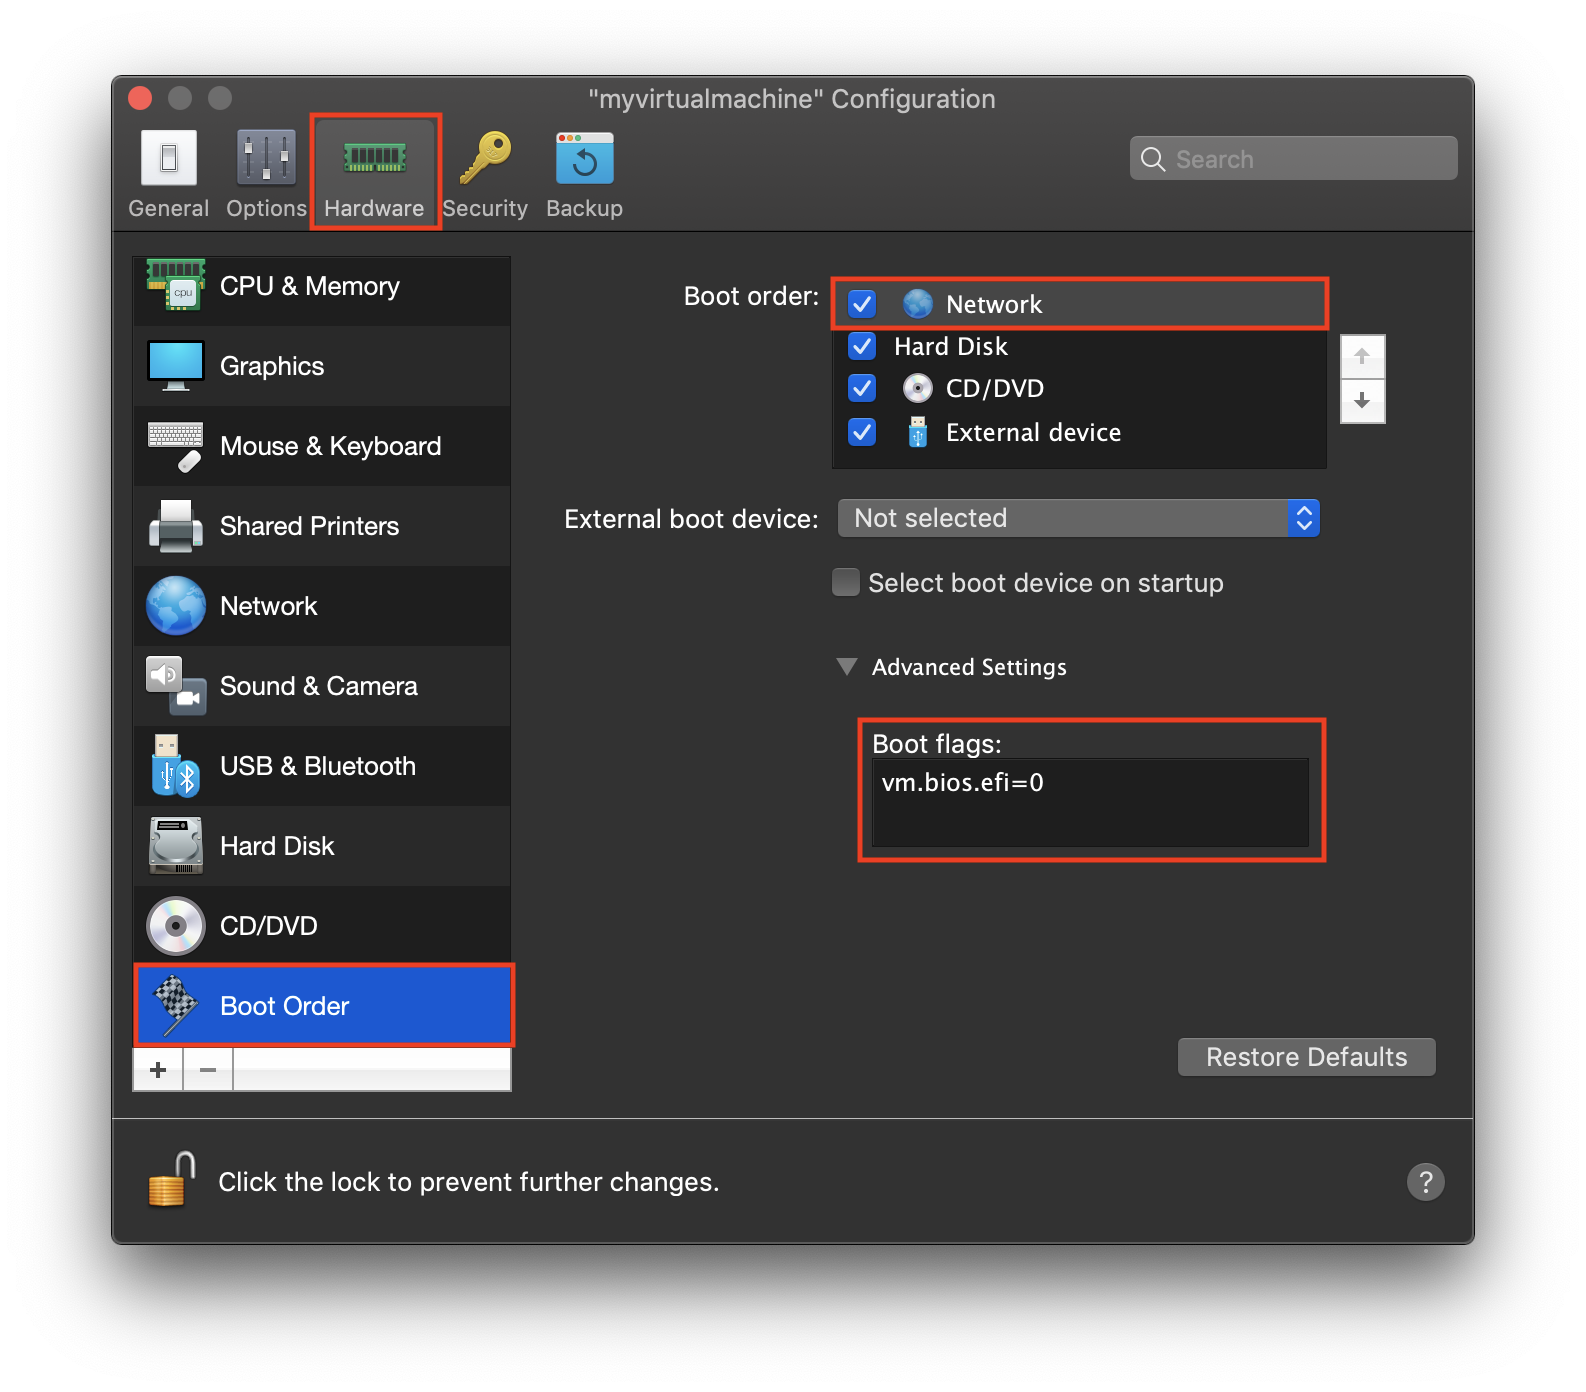
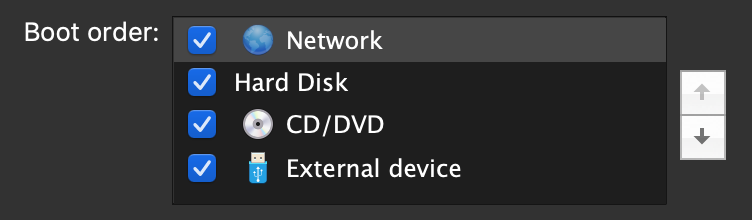
In the Hardware Tab > Boot order, set the Network as first choice and open Advanced Settings to define the following Boot flags:
vm.bios.efi=0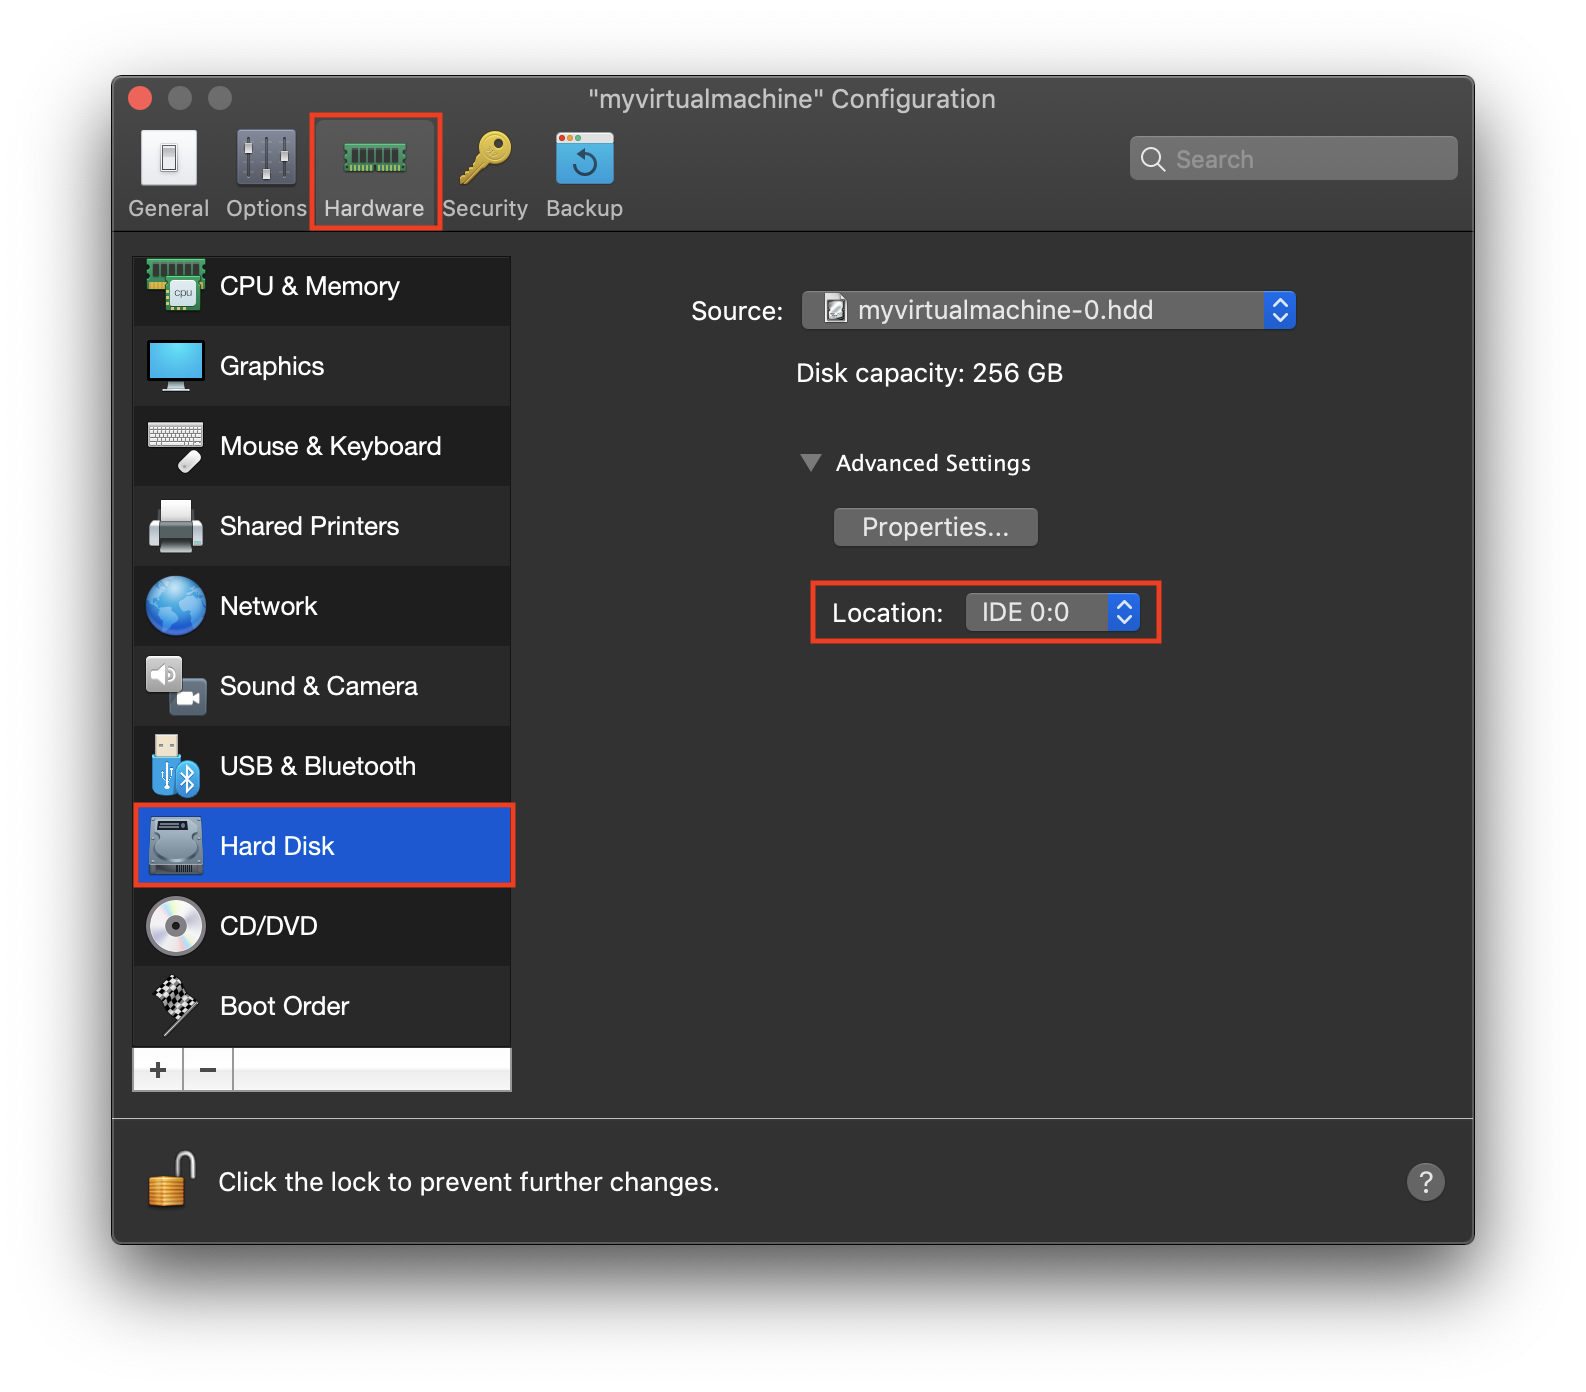
-
In the Hardware Tab > Hard Disk 1, reconfigure the disk to be “IDE” rather than “SATA”.
-
When you have completed these steps, the first part of your Virtual Machine configuration is done. You can proceed to register it in the Network DB before you boot it for the first time.
Register the machine in the Network DB
Go to https://network.cern.ch and click on “Register Device”. Continue with the correct Hostname (less than 15 characters) and OS. Please associate the MAC address from point 7 above with Ethernet adapter (necessary for PXE) - check the example below.
Avoid reusing any existing entry previously registered in the Network DB.
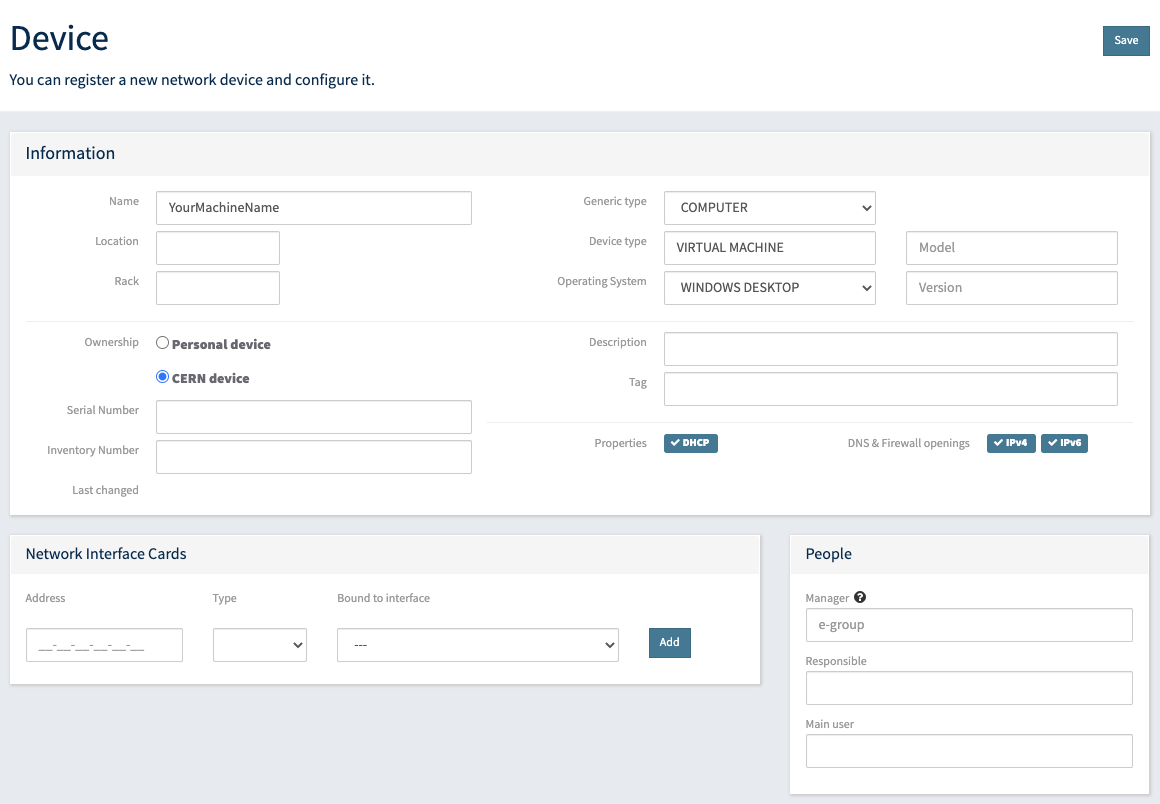
After completing all the necessary entries click “Save”.
A few minutes after this web form is submitted, you can boot your machine on the network to
install Windows in Parallels Desktop as if it was physical hardware.
Install Windows using PXE boot
-
When you boot your VM for the first time, it will try to boot using PXE. This is exactly what is needed to install NICE Windows. When the PXE routine starts, press “F12” to boot from the network installation server
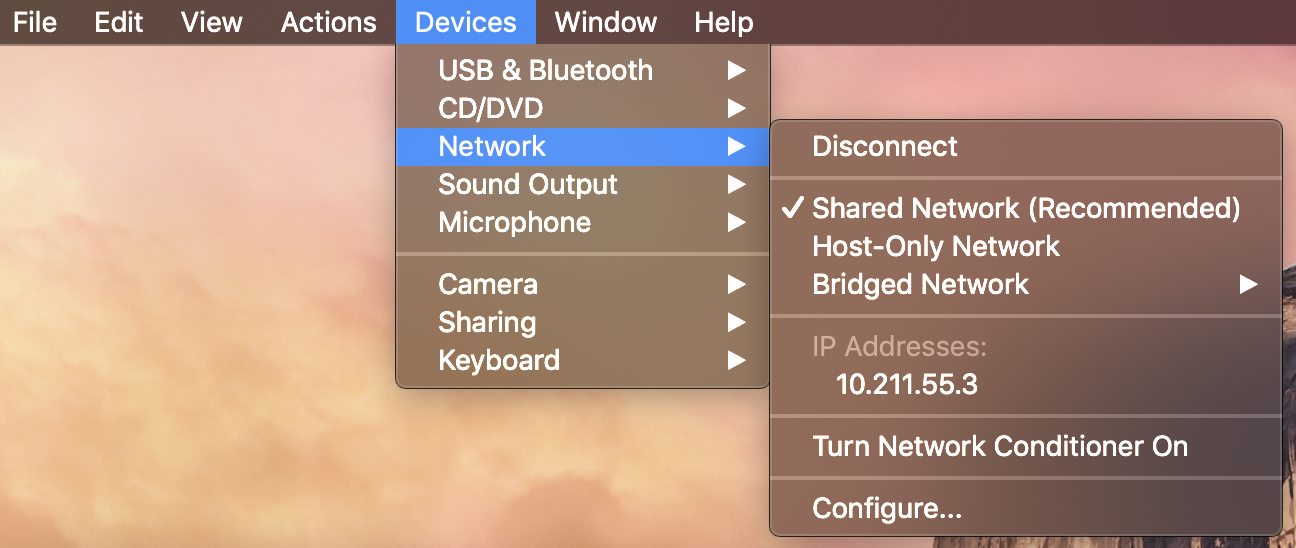
If the network installation server does not respond, please make sure that:-
You are using
Ethernet (Bridged), not Shared Network or wireless - you should see “Ethernet (Bridged)” under Devices > Network 1. -
You are connected to a portable socket - your IP address should be
128.141.x.x.
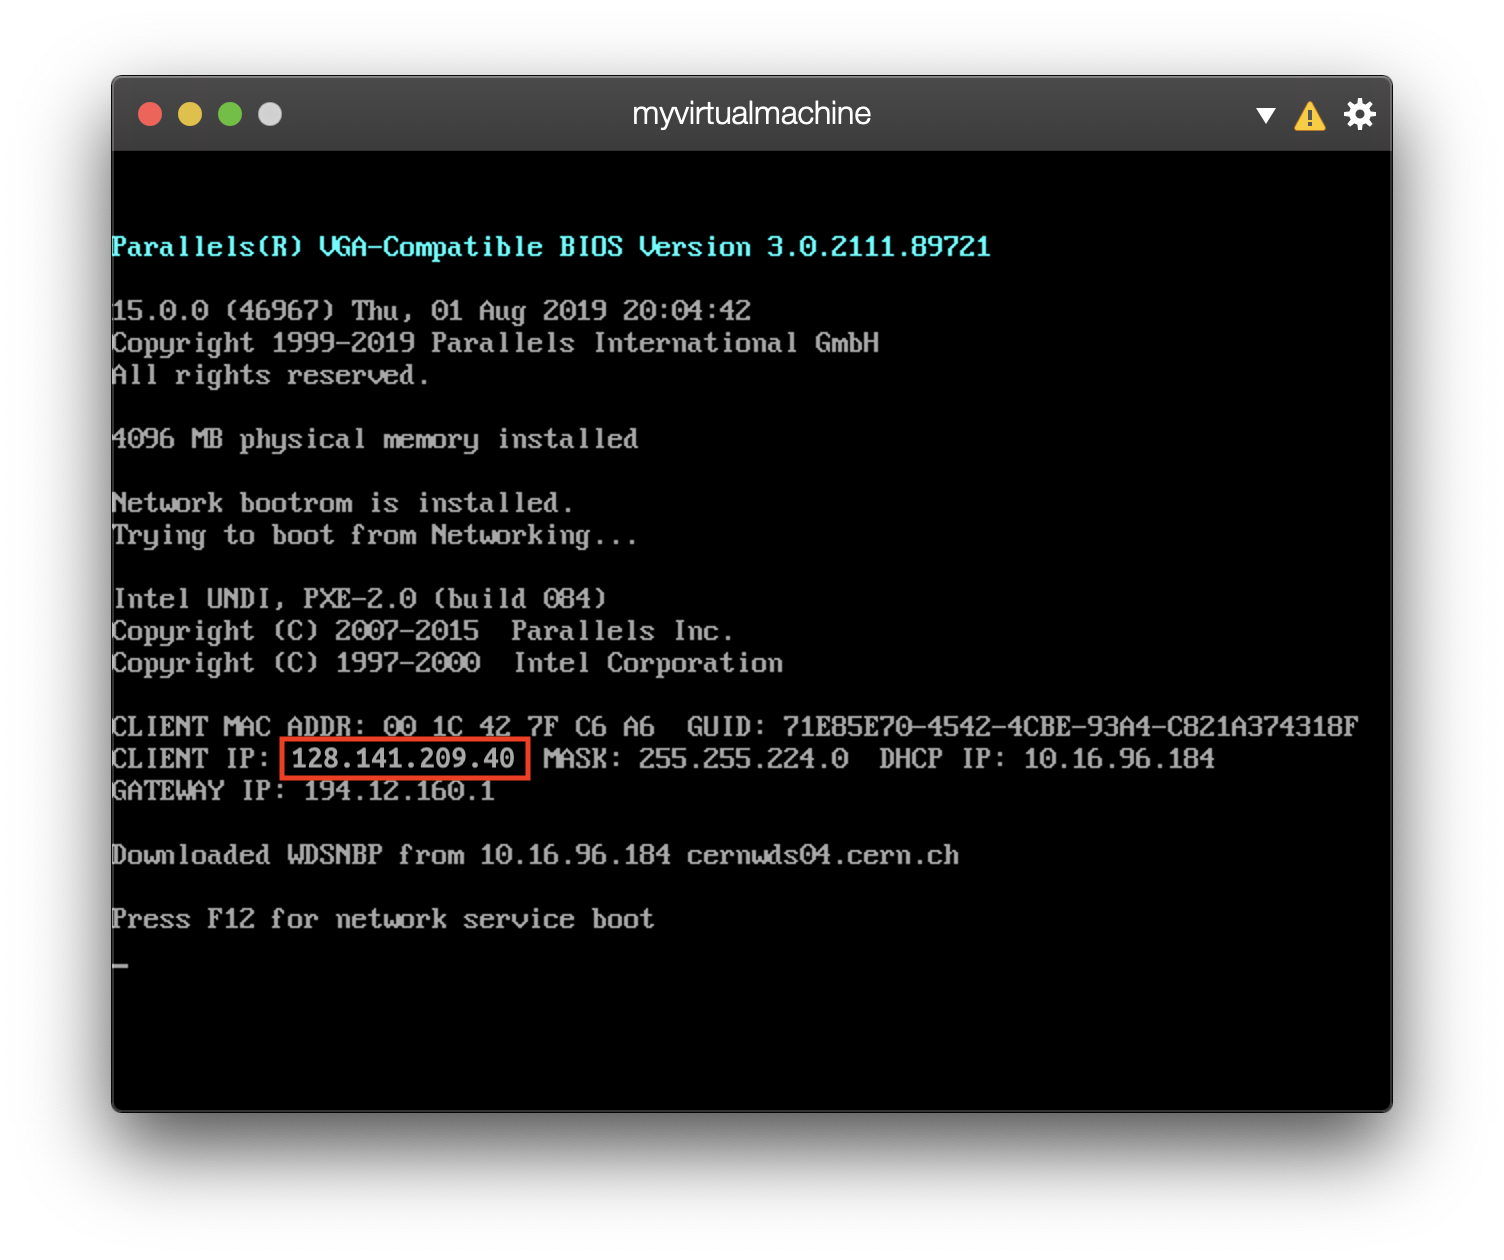
- You have correctly registered your Parallels MAC address in your network registration.
Note
After the virtual hard disk is formatted, your VM will try to boot from the hard disk. If the OS is not installed at that time, you may need to adjust the boot order on the Hardware tab of your VM configuration in Parallels, so that it boots from the network. This is not necessary if the OS is installed immediately after the system partition is created.
-
-
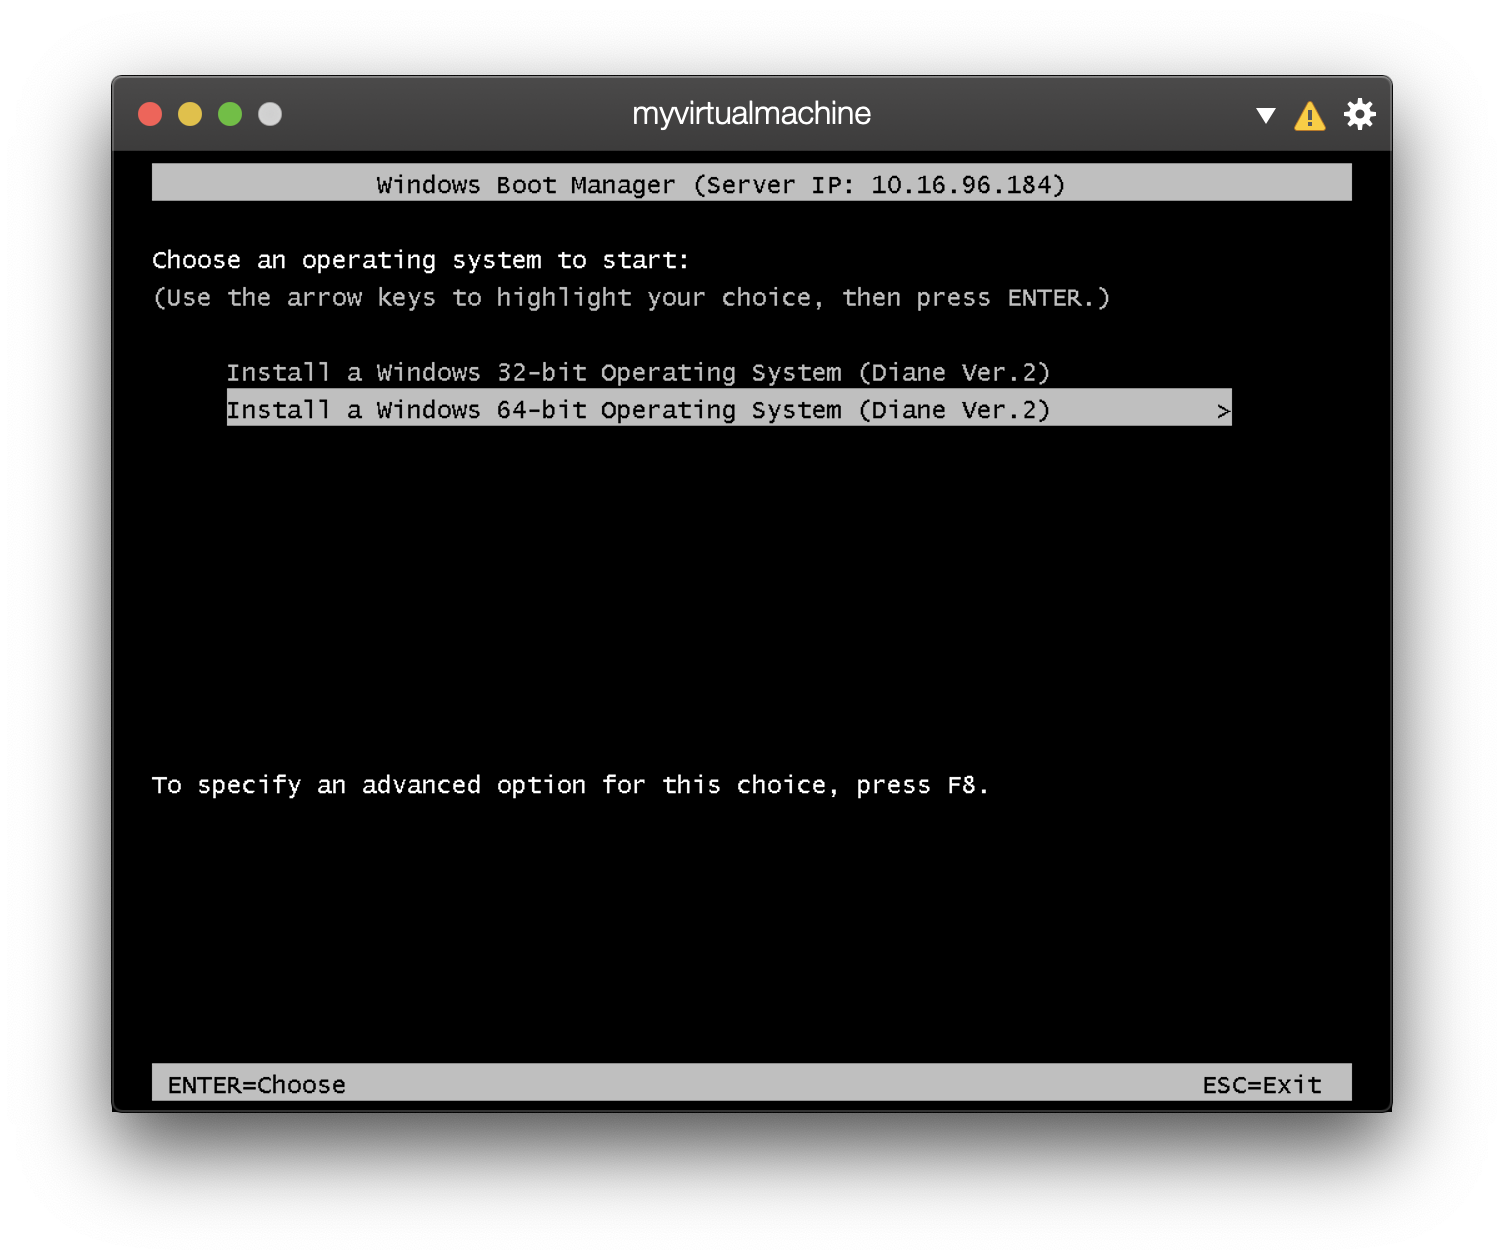
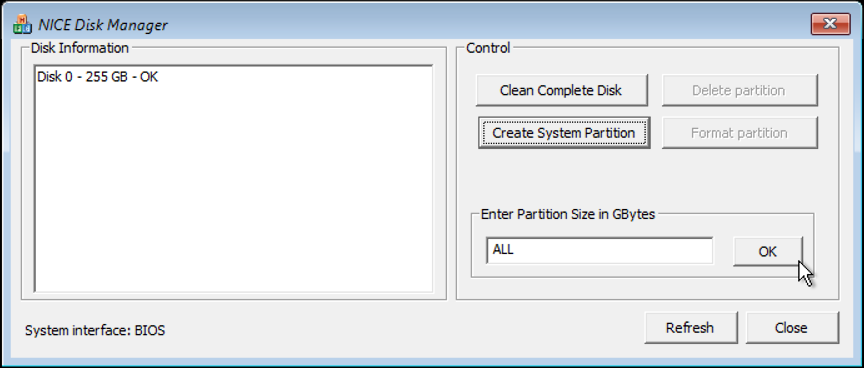
Select “Install a Windows 64-bit Operating System” from the network installation menu.
-
Click on Disk0 and then on “Create System Partition”. For Partition Space, use ALL and then click OK to format it.
-
Save the admin password in case you need it later and click “Install”.
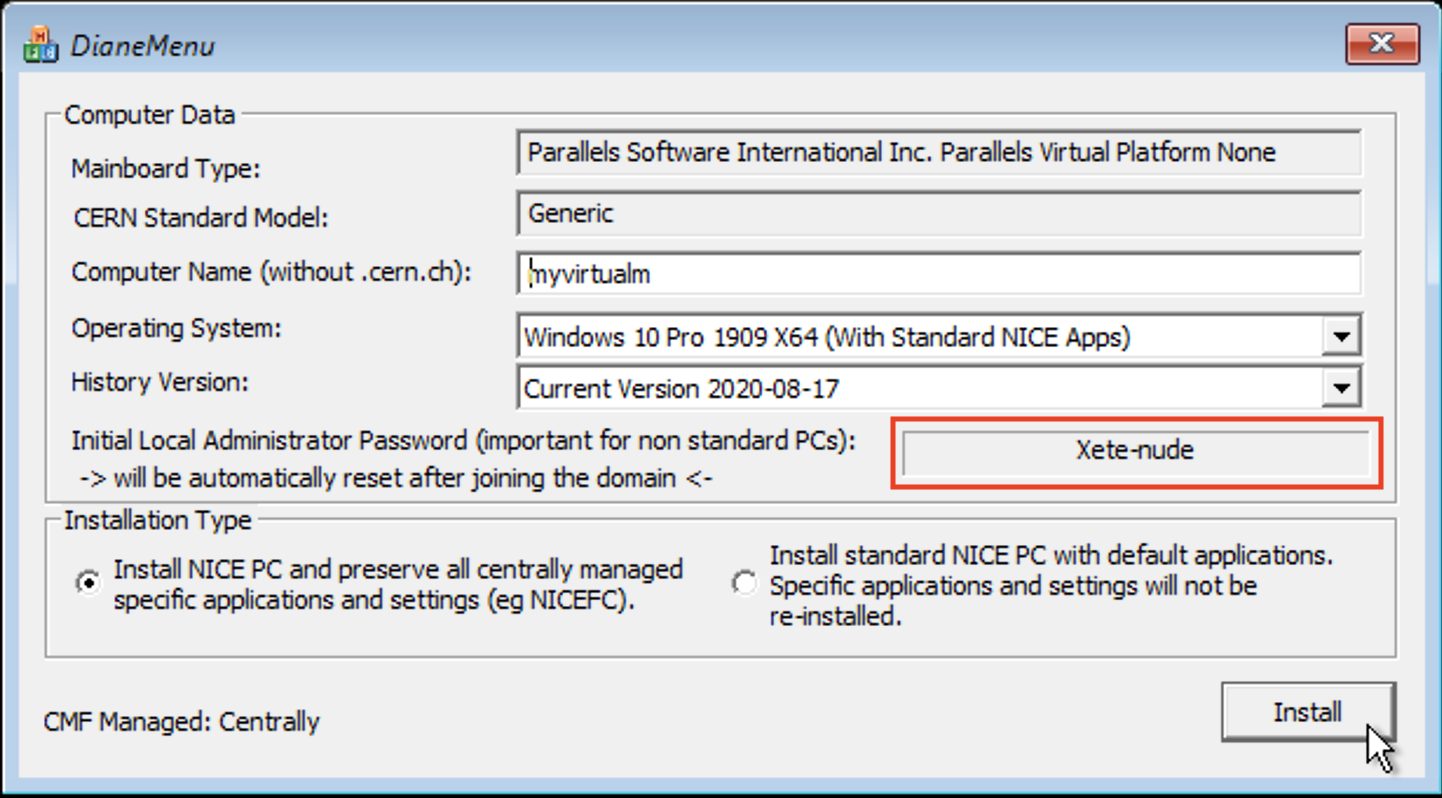
In case the creation of computer account fails at this stage, please contact the Service Desk.
-
The standard network installation of NICE Windows will now start. It will take about an hour to complete - please make sure that you stay connected to the network until it completes. After the basic installation, CMF will proceed to install standard applications. At the end, you should see the standard Windows login prompt.
If at the end of the installation you can see the desktop rather than the logon prompt, please execute step 5b before continuing.
Log on and final configuration steps
-
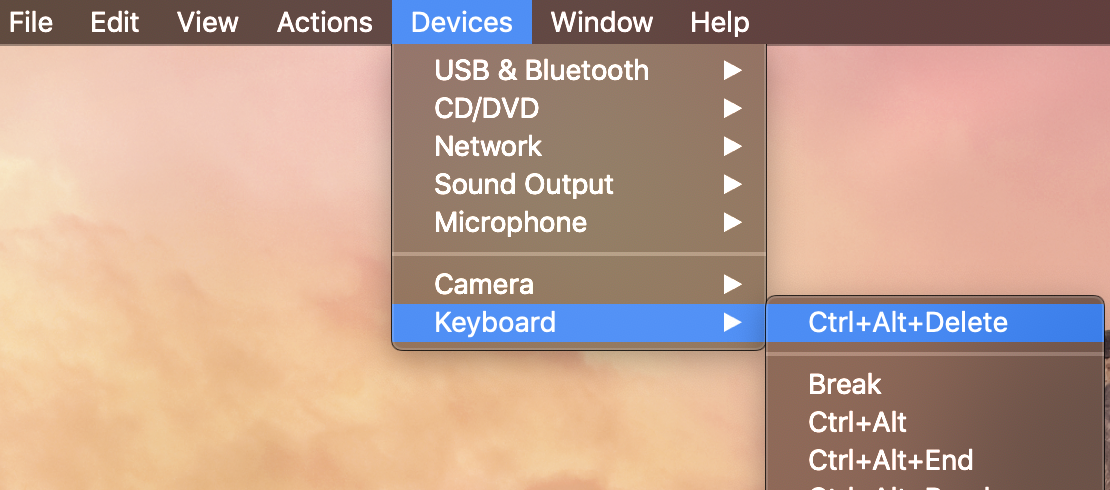
When the logon screen is shown, you might need to send “Ctrl+Alt+Del” before you can log on. You can do this by clicking on Devices > Keyboard > Ctrl+Alt+Del from Parallels Desktop application menu. Log on using your CERN credentials.
-
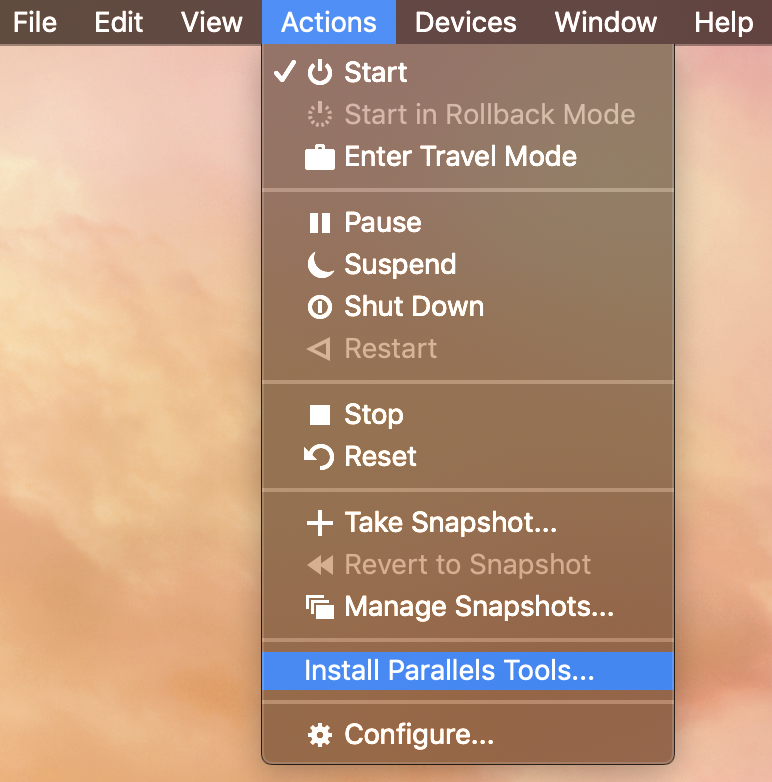
Install the Parallels Tools to able to share data between your Mac and your Windows VM.
You might get a message like this:
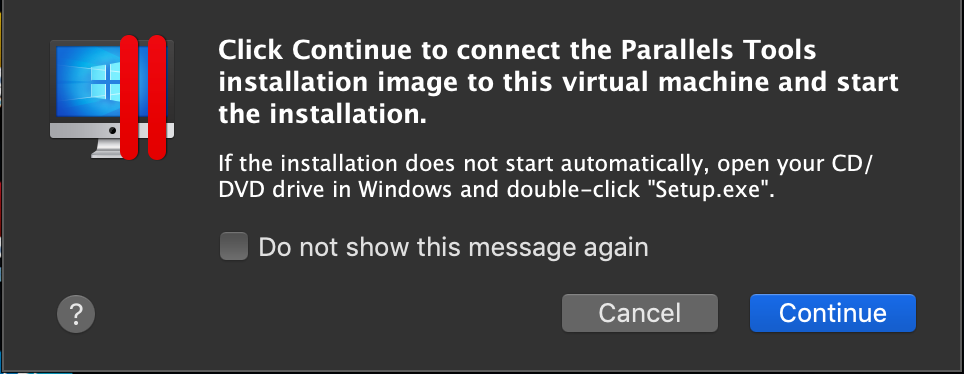
In that case (and only if Parallels Tools installation does not start automatically) navigate to “This PC” > CD/DVD drive. Double click on “Autorun.exe” and the installation will start.
-
To install applications, please use the CMF icon from the Windows Taskbar tray area to Add/Remove CMF Packages. Note that if you use Share Network (see below), you may need to specify the correct hostname and later use the CMF “Refresh” function.

-
If you frequently change between wireless and Ethernet networks on your Mac, you may find it easier to use Shared Network, as it automatically reconnects when you pass from Ethernet to wireless.
Documentation
Parallels counts with extended online documentation that can be found in their website.
https://download.parallels.com/desktop/v15/docs/en.lproj/toc.htm
User support
To report any incidents or requests, please open a SNOW ticket